Hi Folks!
So today we have reached the 12th and final day of the Scheepjes Christmas Blog Hop 2015!
I think you will all agree, we have seen some stunning patterns and great ideas :-)
Yesterday we visited the lovely Bernadette and saw her stunning Christmas Noel Collar *swoons*
I thought I'd do a quick recap of the projects just in case you missed any, so here goes!
Day One
Annelies' Decorative Hanger
Day Two
Sarah's Secret Surprise Santa
Day Three
Nerissa's Christmas Gnome
Day Four
Tammy's Candy Cane Wine Cozy
Day Five
Tatsiana'a Gift Tag
Day Six
Carmen's Sweater Make-over
Day Seven
Jellina's Crochet Christmas Trees
Day Eight
Atty's Crochet Christmas Angels
Day Nine
Esther's Crochet Mandala Jar Topper
Day Ten
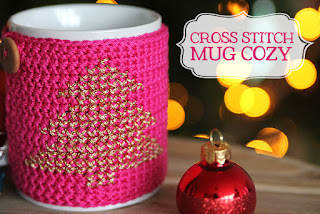
Kirsten's Cross Stitch Mug Cozy
Day Eleven
Bernadettes Christmas Noel Collar
Aren't they fabulous?....and best of all?.....all free!!!!
Ok so if you've been following my blog, you'll know that I've been learning to knit socks. Actually, it's turned into a bit of an addiction! So it popped into my head the thought that by varying a sock pattern you can make all manner of things! Cool!
And with winter upon us, what better than a snuggly hot water bottle cover??!!!!
I promise that it's really easy! If you can knit and purl you can make this. Ok there are a couple of other techniques involved too but I've found some lovely video tutorials that will help you.
The main body is knitted and I've added some simple crochet snowflakes to decorate but you can add whatever you like.
Ok let's get started!
Ingredients!
(NB the pattern is for a 2litre bottle - if yours is smaller or larger you will have to adjust the pattern accordingly)
Hot Water Bottle (Mine is a 2 litre one that I bought cheaply from Amazon)
5mm circular needle with a decent length cord (minimum 80cm....it just makes it easier when working the magic loop method)
3 - 3.5 mm crochet hook (I've used a 3.5 as I hook tightly)
Scissors and a darning needle.
Techniques Used
Judy's Magic Cast On (JMCO)
Magic Loop
Jeny's Surprisingly Stretchy Cast Off
M1R & M1L
SSK
K2tog
Duplicate Stitch (optional for adding detail to the reverse)
Just click on the technique and it will take you to the tutorial :-)
Let's do this!!!!
Using JMCO cast on 48 stitches (24 on each needle)
Knit one round (remember to knit into the back of the stitches on the second needle to untwist them!)
Increase Rounds - to shape the bottom of the hot waterer bottle we will increase on alternate rounds until we have 64 stitches in total (32 on each needle). There are 2 rounds that will form the increase pattern as follows:
Round 1 (knit 1, M1L, knit to last 2 stitches, M1R, knit 1) Repeat on second needle.
Round 2 Knit
Repeat until you have 64 stitches.
Knit the next 52 rounds. Try your hot water bottle cover on regularly to check for fit. (ummm.....on the hot water bottle....not yourself ;-) hahaha!!!)
You should now be ready to start the decrease rounds!
Don't worry if it feels a little loose. Remember that when filled with water the bottle will expand a little :-)
Decrease Rounds
Again these are made of 2 rounds as follows:
Round 1 (knit 1, SSK, knit to last 3 stitches, k2tog, knit 1) Repeat on second needle
Round 2 Knit
Repeat these 2 rows until you have 36 stitches (18 on each needle)
Home stretch now!
Knit 1 round.
We are going to knit the neck cuff twice the required length so we can double it over and give the appearance of a polo neck!
Work 33 rounds of knit 2 purl 2 rib.
Cast off using Jeny's surprisingly stretchy cast off.
Now this is important! If you don't use a stretchy cast off you make not be able to fit your hot water bottle into it's cover!!!!!
You now have a finished hot water bottle cover ready to decorate!
Crochet Snowflakes
There are tons and tons of free crochet snowflake patterns on the internet. God bless all those lovely designers that share free patterns :-)
I chose 2 free patterns for my snowflakes.
I won't explain the making of them step by step here as quite frankly the instructions on the blogs are fab and why reinvent the wheel??!!!!
I used this pattern to make the large snowflake and this one to make the 3 smaller ones.
They were made with regular Stone Washed yarn in Moon Stone.
After a quick block (this really did transform them so don't skip this step!) they were ready to attach.
I pinned them in place and using the regular Stone Washed I joined them using a stitch at each point.
NB Fill your hot water bottle with water and place the cover over it before attaching the snowflakes!
This helps to prevent the cover being distorted in shape.
Cute huh?
On the back of my cover I added a Scheepjes label and a little triangle of stitches that were sewn using the duplicate stitch method.
I hope you like my pattern and I'd love to see your covers!
Til next time x


