Check out my cotton 8 posts!
Showing posts with label cotton 8. Show all posts

23 Sept 2020

Making Archie

Hello!

Today it's all about Archie and how to make this cutie.
I'll take you through the making step by step and also give you some ideas on different colour combinations and expressions!


YOU WILL NEED:

 A Main colour: Scheepjes Cotton 8 White (502) x 2 balls 
B Scheepjes Cotton 8 Light Pastel Green (664) x 1 ball 
C Scheepjes Cotton 8 Soft Pink (654) x 1 ball
Black yarn for face (I used some Cotton 8 in Black (515) as I have an impressive stash of this yarn!!!)

3.0mm crochet hook
Tapestry needle for joining and sewing facial expressions
12x12" cushion pad
2 buttons for eyes (make Archie with sewn eyes if you are giving to small child as buttons are a choke hazard and we don't want any choking incidents!)
Blocking materials
Scissors

HOW TO

The body of the cushion is made with star stitch. It's a stitch that give a lovely texture and gives beautiful texture. The star stitch is worked over 2 rows. 

Bella Coco has a really lovely video explaining how to work this stitch and it can be found HERE

Make 2 pieces for front and back.

Using main colour A and 3mm hook, chain 77

Row 1 (RS): Insert hook into 2nd chain from hook, yarn over and pull up loop (2 loops on hook), insert hook into next chain, yarn over and pull up loop (3 loops on hook). Continue until you have 6 loops on hook, yarn over and pull through all 6 loops. Chain 1 to create the 'eye' of the star stitch. To make the next star, insert your hook into the eye, yarn over and pull up loop (2 loops on hook), insert hook between the last 2 spokes of the previous star you've just made, yarn over and pull up loop (3 loops on hook), insert hook into the same chain where you've worked the last spoke of the star stitch, yarn over and pull up loop (4 loops on hook), work into the next 2 chains in the same way and you will now have 6 loops on your hook. Yarn over and pull through all 6 loops. Continue working stitches until you reach the last stitch. Work one half treble in the last stitch. Turn work.
Row 2 (WS): Chain 2 (counts as first half treble), now work 2 half treble crochets into each eye of the star stitches of the previous row. Work 2 half trebles into the last stitch.

The following star stitch works are worked in almost the same way as row 1 except you'll begin each row with a chain 3 and start working into the 2nd chain from hook. 

Continue working star stitch until you have worked 44 rows. 
Join in colour B (do not cut colour A) and work a further 5 star stitch stripes alternating between colour A and B, carrying the yarn up the side of your work.

Fasten off, weave in ends and wet block to 12" x 12"

To make the ears:


Make 2
inc = work 2 double crochets in the same stitch

Using colour C, make a magic ring and work 6 double crochets into the circle. Pull the circle tight. Turn.
Row 1: Chain 1 (counts as dc), inc, dc, inc , dc, inc (9 stitches) turn
Row 2: Chain 1, inc, 2 dc, inc, 2 dc, inc,  dc (12 stitches) turn
Row 3: Chain 1, inc, 3 dc, inc, 3dc, inc, 2 dc (15 stitches) turn
Row 4: Chain 1, inc, 4 dc, inc, 4 dc. inc, 3dc (18 stitches) turn 
Row 5: Chain 1, inc, 5 dc, inc, 5dc, inc, 4 dc (21 stitches) turn
Row 6: Chain 1, inc, 6dc, inc, 6dc, inc, 5 dc (24 stitches) turn
Row 7: Chain 1, inc, 7 dc, inc, 7 dc, inc, 6 dc (27 stitches) turn
Row 8: Chain 1, inc, 8 dc, inc, 8 dc, inc, 7 dc (30 stitches) turn
Break colour C, join colour A
Row 9: Chain 1, inc, 9 dc, inc, 9 dc, inc, 8 dc (33 stitches) turn
Row 10: Chain 1, inc, 10dc, inc, 10dc, inc, 9 dc (36 stitches) turn
Row 11: Chain 1, inc, 11 dc, inc, 11 dc, inc, 10 dc (39 stitches) turn
Row 12: Chain 1, inc, 12 dc, inc, 12 dc, inc, 11 dc (42 stitches). Fasten off and weave in ends. 

THE FACE!

This is where you can have some fun!
It is really amazing how slightly altering an eye can change the whole expression of a face!

I embroidered Archies nose and mouth using back stitch and satin stitch for his nose. I just lightly used a pencil to sketch out the face but you could use any kind of disappearing pen (the kind used in embroidery)
His eyes on my version are buttons and eyebrows are a simple straight stitch. 

Add the face before you join the pieces together - so much easier than trying to wrestle with a cushion!!

Below are some simple faces showing how slightly altering lines can change the face. 


To join together, blanket stitch the front and back around 3 sides together using yarn A leaving the bottom edge open so you can insert the cushion pad. 
Next attach the ears with an over stitch, positioning the ears at a slight angle. 
Insert your cushion pad and blanket stitch the bottom opening. 

TAaaaDAaaaa!!!! 
Your cushion/Archie Bear is finished. 


Why not make a brown bear with a navy and white striped jumper?
He could be Archies French cousin Pierre!!!!!

Have fun, I hope you enjoy making Archie and pals!

Til next time when I have some new yarn to share.... x

16 Sept 2020

Meet Archie.......

I think he's a bit cute...


Made from Scheepjes Cotton 8 100% cotton yarn, he's a quick and affordable make.
Perfect for a "Welcome Baby" gift.... or a "just because" present. 

Hook him up with different colours and you've got a Teddy that any child would love. 


I had really good fun making him.
Playing with expressions.... it's amazing how slightly altering an eyebrow gives a completely different look. But more on that next week when I'll share how to make this cutie! Promise it's not too tricky!


Join me next time for some Archie making goodness!

Til then x

9 Sept 2020

Progress.... but on what??!!!

Well hello!
Thought I'd drop by and share some progress photos...
If you remember, I'm making something with Scheepjes Cotton 8
One of my top favourite yarns. 
I think I gushed enough in the last post so I'll not repeat myself!

Oh I'm really loving this make. It's something quite different for me.
In fact, it's very different.
This year, I'm trying to stretch out of my comfort zone in many ways.
Trying new colour combinations, new styles, new crafts...all manner of new things. 
It's easy to get stuck in a rut I think.


So here we are. What is it? .....well......


It has 2 main pieces....


Made from star stitch (love the texture this stitch gives!)....


2 wash cloths? 
Nope.....
I think I'll leave you guessing until next week!
Mean huh?!!!!
Yup...very mean!
But it'll be worth it....
Prepare for cuteness overload....

Til next time 😉

1 Sept 2020

An old love.....

Well hello dear readers! It's been a while. A blummin long while.....
I'm not exactly sure where the last 6 months have gone. I blame COVID-19.
I blame COVID on a lot of things. An awful lot of things!
These 6 months have been truly horrible. One day I'll fill you in on the gory details, but for now, I think some yummy yarn is in order!

I may have been absent on social media of late but crikey my hands have been busy whipping up all manner of goodies!
Today I thought I'd share the yarn for a project that will have a free pattern. I like sharing free stuff. It's what makes me happy. 

This project was thought up when I saw some unbelievably cute images on Etsy. Well, straight away my mind went into overdrive.... Hmmmm...I could make something lovely along those lines....what if I did it like this.....let me just have a quick practice. Voila! That's how my mind works.
It usually leads me onto lots more ideas....it's a rabbit hole!!!!

Ok enough waffling. 
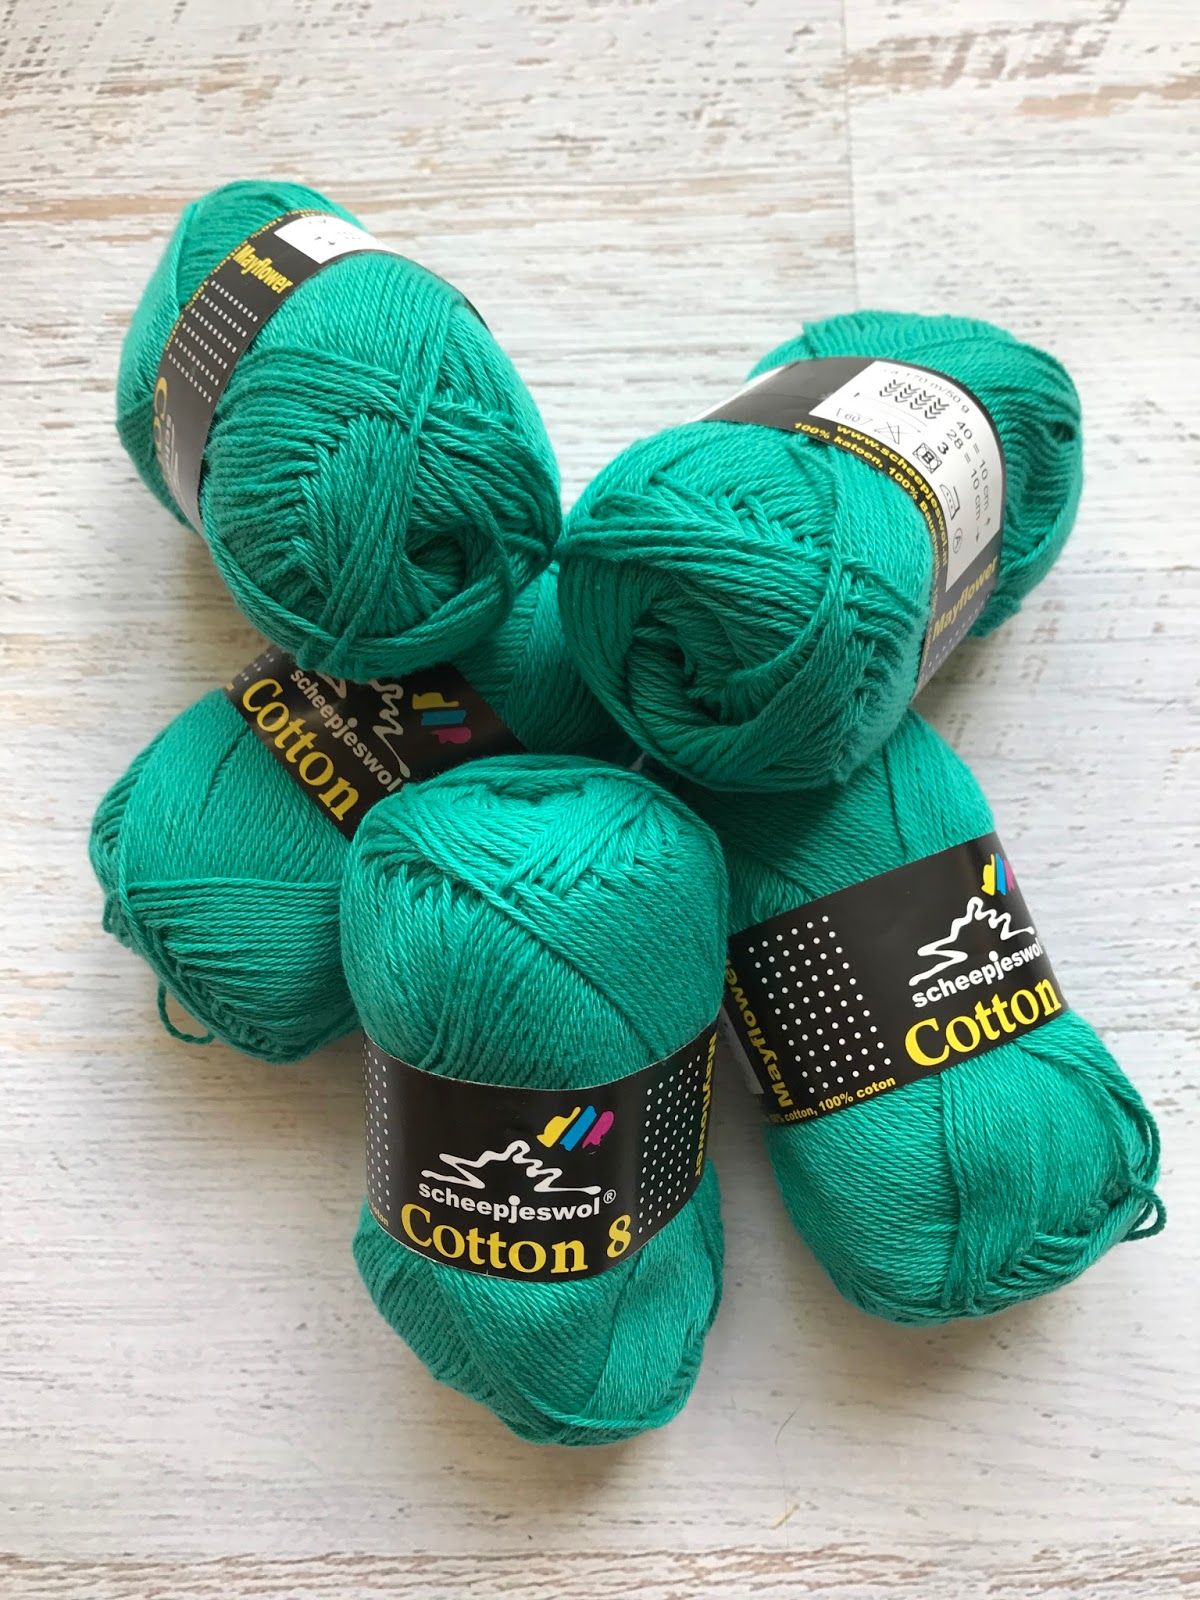
Let me share the yarn and the colours I've chosen.


Cotton 8 was the first Scheepjes yarn I fell in love with. It's still up there in my top 3. 
It's not mercerised. The more it gets handled, the softer it gets. It's available in a HUGE (48!) range of colours. It comes in 50g balls and you get a whopping 170m of 100% Cotton yarn. It's a fingering weight that, when blocked, has a beautiful drape to the finished fabric. And best of all, it's a very affordable yarn at £1.99 per ball. 


I don't think I'll ever tire of this yarn. I've made soooo many projects with it and they're all still going strong!


You can see that it's machine washable at 40 degrees. I know it says don't tumble dry... but I've made lots of dish cloths with it that have gone through a 60 degree wash and been tumbled..... but shhh..... don't tell!

For my project I've chosen 4 colours.... well 2 main colours and scraps of the others (I have a significant Cotton 8 stash....dating back to over 10 years ago!). Join me next week and I'll share some progress photos with you. 

Hint, hint.... this would be perfect for gift making.... in plenty time for C.......... (the word not to be uttered until at least October!!!!)

Til then x

1 Nov 2018

YARN Blog Hop - Every Fairy Needs a Home!

Hello my lovelies!
Today I'm seriously happy to be taking part in this wonderful blog hop to celebrate the launch of YARN FOLK.


Yesterday Jellina told us about her gorgeous designs (I am soooo making her Farah Scarf!!!) and today it's my turn to tell you about my contribution.

But before I do.....I just wanted to talk a little about this publication.
YARN is a bookazine (not quite a book but so much more than a magazine) produced by Scheepjes twice a year. If you have not had the opportunity to see it in person I urge you to lay your hands on a copy at the first opportunity! 

You can find stockists HERE.

It really is a thing of beauty and I am incredibly proud to be part of it.
This edition has 17 project to make. Yes! 17 patterns!!!
And the styling of this is something to behold.....it really is a collectable!
Each edition has a theme...this time it's FOLK
I love all things folk. Be it music or art....it makes my heart sing.....
What better to make for this edition than little houses for fairies????!!!!!
Because as we all know....every fairy needs a cute lil house to live in!
To be honest, it was a very straightforward make/design. It just kind of flowed. 
I've made the houses in 2 sizes, but the pattern is really simple to adapt and make whatever size your fairy needs!


I've used my favourite Scheepjes Cotton 8 as the base for the houses with scraps of felt, pom pom trim and buttons to decorate. You can raid your sewing box and use whatever you have to hand to jazz these little houses up. And they are super quick and easy to make. Perfect for a beginner project! 

3


These little houses only take a couple of hours to crochet and then you embellish them to your hearts content.... dig out those random themed buttons you once bought at a craft fair just because they were too gorgeous not to come home with you....add the ribbon you've been saving for that special project....you can have some fun making them unique. Be sure to share your little fairy house creations!


Scheepjes are having a give away to celebrate the launch of YARN 6. To be in with a chance to win, head over to their Facebook post HERE for further details. 

Be sure to head over LillaBjorn Crochet tomorrow where Tatiana will share thoughts about her YARN designs!

Til next time.....I have some new yarn and new project ideas to share!!!

post signature

29 Apr 2017

Happiness In A Shawl Reveal

Ah! Happy happy happy!!!!
My gorgeous Happiness shawl is completed.
I LOVE IT!!! 💚💚💚
My favourite colour, my favourite yarn and a pattern by one of my favourite designers.
*contented sighs all round*
Let's do a quick recap before I show you the finished shawl....
The yarn is Cotton 8 by Scheepjes


I chose this stunning colour (723) 💚


And THIS beautiful shawl design by Bernadette Ambergen.
I wanted a shawl that was a decent size and it was to be used as a lightweight cover up on the chilly summer evenings.
Here it is.....


As you can see from the photo it's a great size!


And the lacy border gives it a bit of interest.


Cotton 8 is wonderful to work with. It's non splitty and just seems to work up like a dream. 


Blocking really brings the lacy design to life. The best thing about Cotton 8 is that the more you handle and wear it, the softer it gets! I've already got a smaller shawl made with it and it wears really well. I'm looking forward to wearing my Happiness shawl with pride!!!

Til next time x
post signature

28 Mar 2017

Happiness is.......

Using my favourite yarn by Scheepjes to make something from one of my favourite crochet designers.
I know!!! Doesn't get much better than that does it?
Ok.... throw some decent gin into the mix and I think we have recipe made in heaven 😜
Cotton 8 was the very first Scheepjes yarn I discovered. It was being sold on a market stall in Groningen (which is a stunning Dutch city by the way!). I was blown away by the colour choice and also the price. I loved the feel of it. It didn't look splitty. It had an expensive feel about it but with an affordable price tag. Perfect for the newbie hooker I was back then. I made my first BIG project with it. Oh the anxiety of it all....what if I messed it up? What if it didn't look good? 
Well to be honest, it didn't really matter. Because Cotton 8 is so affordable, if I made mess it was no big deal. But you know what? I didn't! And....that blanket still lives on my bed today. Cotton 8 just gets better and better with use. It goes sooooo very very soft and snuggly. One day I'll get around to making that blanket bigger....one day....
However I digress! 
Where was I? Oh yes! New project!!!
I need a new shawl. Meh......well maybe I don't need a new one....but I sure as hell want one. 
It's the same thing really 😉
I rather thought this one would fit the bill.....


Stunning isn't it? It's called Victoria and you can find the pattern HERE.


I think it will be a beautiful shawl to wrap around my shoulders on chilly summer evenings.

I'm planning on making it a decent size. Nothing worse than a shawl that doesn't wrap all around!
The shawl is designed by the very talented Bernadette Ambergen.....or Berniolie as she is known on Ravelry. Check out her work! I can't even begin to imagine how she dreams up these designs!!!
I've made a few of her designs before....

Stunning aren't they?
Anyways back to the shawl! 

I chose this stunning colour to work with. Its colour 723. 
I've made a start and am working through it quickly.


It's a lovely relaxing project to make so far. Perfect to hook whilst watching TV.
I'm hoping to have it finished in a couple of weeks. 
I'll keep you posted on the progress! 

In the meantime, do pop over to Bernadette's shop. 
I'm sure there's a pattern in there with your name on it screaming to be made 😉

Til next time x
post signature

1 May 2016

Monsoon Stole Reveal

It's a lovely feeling. Finishing a project.
Especially if it's a project that you've adored making and the finished item looks even better than you thought it would!

So today I'm going to show you my finished Monsoon Stole.
The stole was designed by Alia Bland from The Little Bee blog and can be purchased here.

It's not very often I buy a pattern but when I saw this stole on ravelry I just knew I needed to make it! I also knew I had the perfect yarn......


Scheepjes Cotton 8 is one of my all time favourite yarns. 
I have a very healthy stash of it! 
Why do I like it so much? Well... it's a pure cotton that doesn't split for a kick off. Splitty yarn drives me insane! The twist in this yarn is just enough to keep it from splitting but not too much that the yarn is stiff. This yarn gets softer and softer the more you handle it. It's a 4ply weight yarn that you can throw in the washing machine without stressing (although I would recommend using a colour catcher if you have a wide range of colours in one item...just to be safe!). 50g gives you 170m of yarn at the bargain price of £1.99! (you can buy it here!) Recommended hook size is 3mm but I vary this according to the finish I want. 
Oh and the colours.....46 delightful shades! And that's not including the Sunkissed collection. 

For my Monsoon Stole I chose the following colours:

722 - Ochre x 50g
720 - Fuchsia x 50g
726 - Moors x 50g
669 - Olive x 50g
671 - Rust x 50g
717 - Bordeaux x 150g

I used a 4.5mm hook to give a lacy appearance.

The pattern was very easy to follow and beautifully written. There are lots and lots of photos to follow so know exactly what the pattern should look like when finished. 
Because of the mixture of stitches used in this design, blocking is essential!
I used my trusty play mats and some blocking wires to pin out after I had given it a good soak. 

Ok enough talking....let's take a look!


I love how these colours work together! I made the section worked in the Bordeaux colour longer.


Check out those different stitches... *swoons*


I just adore the lacy edge!


Some close ups!


And there you have it! My version of the Monsoon Stole. 
Whilst it looks like a complicated pattern, it was very quick and easy to make. 
I finished it in a weekend! I may have to make another!

If you've made this stole, I'd love to see it! Leave a link in the comments ;-)

Til next time x

post signature

19 Apr 2016

Monsoon Stole Delight!

Hi Folks!
I know!!! Another blog post so soon....the world may end ;-)
Just thought I'd quickly show you one of the things I've making over the last couple of months.
Well the stuff I can share anyways as quite a bit is secret ;-)
A few months back I saw a photo of the most stunning stole. 
It just stole my heart (get it???!!!!!)
Okay aside from the crappy jokes I really adored this stole pattern. It's designed by Alia Bland and the pattern can be bought here. Now I'm not a one for paying for patterns but I gladly parted with my cash for this one!!!
I dug into my rather large stash of Scheepjes Cotton 8 and picked out some colours. 

This was my colour selection :-)

Cotton 8 is my favourite of all the yarns made by Scheepjes. I love it. The colours are fabulous and it's not splitty. The more you work with it and wear it the softer it gets. 
And at £1.99 for a 50g ball it won't break the bank either! 
UK folks can buy it here! Just go look at those gorgeous colours!!!


So off I set to work. I quickly became completely absorbed in this pattern (extremely well written I might add) and really struggled to put it down! 
Don't you just love how these colours meld together to give an autumnally jewel vibe?
I finished this stole in record time as I couldn't put it down!
I've taken some finished item photographs and will share them soon.
Have you made this stole?
I'd love to see yours ;-)
Til next time x
post signature

6 Dec 2014

Scheepjes Christmas Blog Hop - Christmas Baubles!

Welcome the my contribution to this wonderful blog hop :-)

Ok so let's start off with a little recap on the beautiful projects we've seen so far!

Sarah from Crafts from the Cwtch started the blog hop with this stunning Knitted Star Motif


Next we visited Kirsten from Haak Maar Raak for a tutorial on making an extremely cute Reindeer Mug Cozy (including fluffy butt....oh you can't beat a fluffy butt!!!)

 
Then off to see Jellina from Jellina-Creations where we were treated to a gorgeous Christmas Tree Garland tutorial.

The following day we were off to visit Atty's blog for a lesson on making some bright and cheerful Christmas Coasters.


Yesterday we popped over to visit Nerissa at Miss Neriss where we were treated to a fabulous tutorial on making a Christmas Wreath.


And that nicely leads us to today!

As this weekend is traditionally the most popular weekend for decorating our Christmas trees I thought it would be cool to make some baubles. Something special that can be used year after year.


Ready to get started? Ok, let us begin!


You will need....

Yarn of choice. This can be small amounts of leftovers so great for stash busting! I've used Scheepjes Cotton 8 in white (502) and pale blue (652)
Crochet hook (mine is 3mm)
Scissors
Bodkin or darning needle
Needle and thread (if you are adding seed beads you need to make sure that your needle will go through the bead!)
Co-ordinating Buttons
Seed Beads (mine were by Gutermann in colour:1005)
Stuffing
Small lengths of ribbon to hang your bauble

The first step is to make your crochet bauble. There are lots of different free sphere patterns out there on the internet. I found this lovely one. Not only has it got a free PDF download, it also gives you lots and lots of size options. So basically you can make whatever sized bauble that will suit your tree :-)

A word of advice!!!!

When starting on the decrease rows, sometimes you can be left with fairly noticeable holes.
Lalylala has a lovely video tutorial on making an invisible decrease. Give it a go! It really does work!

I would advise starting to stuff your bauble once you've done the first couple of decrease rows. Leaving it to the end will be very tricky and may even cause you to utter some very bad words!!!
Stuff as you hook the decrease rows. That should be your mantra ;-) And remember to stuff firmly. There is nothing worse than a badly stuffed bauble!
Ok, well yes there is....but let's not go there :-)


So now you have your finished bauble :-)
Yes it's fiddly, but isn't it worth it????

This is 14 row sphere. I also made 18 and 22 row ones to decorate.

Basically you can decorate your bauble however you wish :-)
I chose to use buttons on one and seed beads on the other....because I'm a glutton for punishment!

Drag out your button box and choose some buttons that will work with your colour scheme and begin sewing them on. This is a nice activity to do while watching TV. 


I evenly spaced out the buttons I was sewing and didn't worry about it being too uniform. I wanted a rustic appearance hence the different sizes and shapes. I finished by attaching a ribbon.

The seed bead bauble was made by sewing the beads in every little hole made by a double crochet stitch. 


This may sound like a whole heap of sewing but actually, it was very quick! I finished the bauble in about 2 hours whilst watching TV. I love the effect the beads give!


So there you go! Two different baubles to hang on your tree this year and for years to come! You can alter the colours to suit your colour scheme :-)
I suppose I should really put my tree up this weekend to display them!!!

I hope you've enjoyed my little bauble project. Don't forget to pop over and visit Tammy at Canadutch tomorrow! I can't wait to see what she has in store for us. When am I going to find the time to make all of these wonderful projects????

Tomorrow I shall try to explain my prolonged absence from blogland and update on a couple of projects. See you then!

post signature
TEMPLATE DESIGNED BY PRETTYWILDTHINGS