

I'd just like to add, at this point, that in no way am I claiming to have invented this pattern! I'm posting links to pattern sources and an alternative tutorial also. I've adapted the pattern ever so slightly to make it work for me.
Ok, that said, let's get on with making a blanket!!!
Ingredients
You will need:

Yarn (I've used the gorgeous Softfun by Scheepjeswol)
Crochet hook - I've used a 4mm hook as recommended
Scissors
Needle for sewing in ends
The colours I've used for my blanket are:
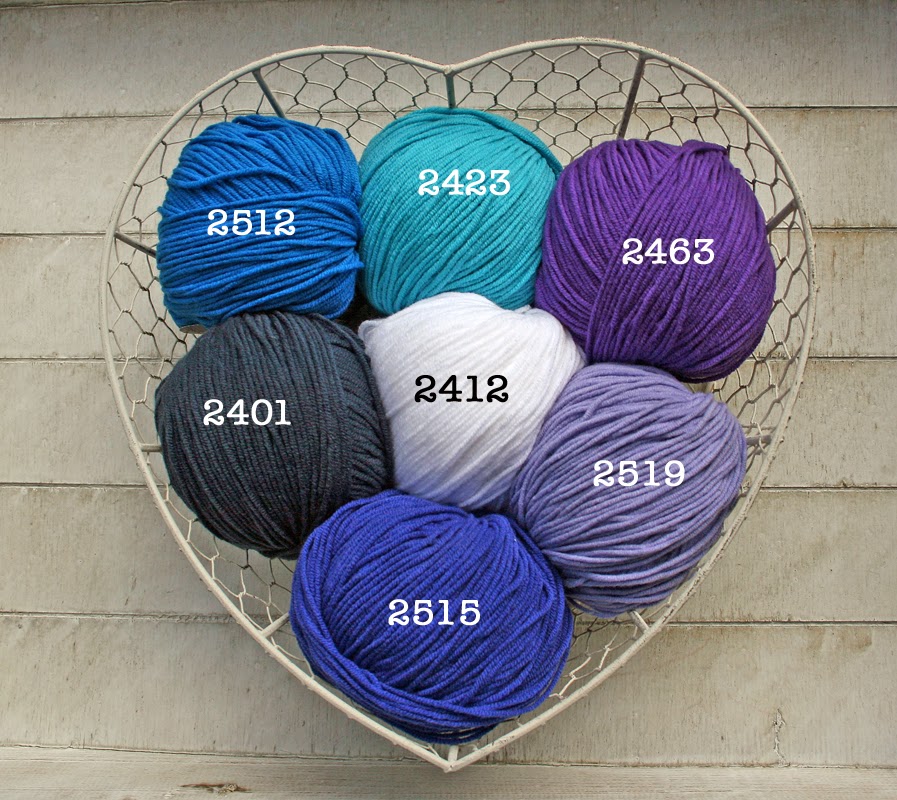
Quantities needed to make a blanket (finished blocked size: 135cm x 105cm including border):
2412: 9 x 50g
2401: 2 x 50g
2512: 2 x 50g
2423: 3 x 50g
2515: 2 x 50g
2463: 2 x 50g
2519: 3 x 50g
These quantities should be ample with a little left over.
The Retro Flower Pattern
I have used a starburst granny square pattern. It's a simple but effective pattern. If you google starburst granny square you'll end up with a heap of links to patterns and tutorials such as this one here.
Pattern is written in English Terms.
To start: with your centre colour, chain 5 and join in the 5th stitch from hook with a slip stitch. Alternatively you can start with a magic circle.

Round 1: Chain 3 (counts as treble crochet) and treble crochet into the centre space 15 times (16 trebles in total). Join with a slip stitch into the 3rd chain of the first stitch. Fasten off this colour.


Round 2: Join your next colour into any treble (Note: you're working in the top of the treble rather than the space in between the stitches).

Next we're going to make a puff stitch! (don't panic!! it's pretty easy if not a little fiddly!) Chain 1 (counts as start of the puff stitch), wrap your yarn round the hook, insert into same stitch that you joined the new yarn to and pull through (3 loops on hook) repeat this 2 more times until you have 7 loops on your hook.

Next, wrap your yarn around the hook once more and and pull through all 7 loops on the hook (this can be the fiddly bit!) Secure the stitch with a chain stitch and there you go! You've made a puff stitch! For the next puff stitch you don't ned to chain 1 to start. Simply wrap the yarn around the hook and insert into the next stitch to start the puff. Just remember that you always finish with 7 loops on the hook.

Repeat until you have 16 puff stitches in total and join into the first puff stitch. Fasten off this colour.

You should end up with something like this (only not out of focus like mine is!!! sorry!)
Round 3: Join your next colour into a space between 2 puff stitches. Now for a cluster stitch! Again, the first cluster stitch is slightly different to the rest. Chain 2, yarn around hook, insert into the space where you have just joined in the new colour and pull through (3 loops on hook), pull through the first 2 loops on your hook (2 loops left on hook). Now repeat this twice more (4 loops on hook), yarn around hook once more and pull through all 4 loops. Chain 2. To make the next and following cluster stitches, yarn over hook and insert into the next space, pull through (3 loops on hook), yarn around hook and pull through the first 2 loops, repeat this 3 more times. You should have 5 loops on your hook. Yarn around hook and pull through all 5 loops. Chain 2.

Repeat this until you have 16 cluster stitches and join with a slip stitch in the first cluster stitch. Fasten off.

Round 4: Join in your next colour into a 2 chain space.

Now we are going to make the circle into a square! In the 2 chain space work 3 double crochets. In the next space work 3 half treble crochets. To make the corner in the next space work 3 trebles, chain 2 and a further 3 trebles

Continue around the circle working into each space as follows: 3 half trebles, next space 3 doubles, next space 3 half trebles, next space corner as before. You should end up with something like this...

And that's the completed square. At this point I will normally block the squares.
Joining the squares: For the purpose of this tutorial I have used a coloured yarn to join the squares. This is simply to show the join more clearly. You will join in the same colour as your last round. There a lots different joining techniques but to give an almost invisible join I really like this technique. It's quick and very effective.

With right sides together, join your yarn into a corner space. Chain 3, double crochet into the next space, chain 3, double crochet...and so on and so on...

When opened out it will look something like this.

Squares joined with white yarn. Wrong side facing.

Right side facing.
Continue joining all your squares in this method.
Blanket Border: For my border I added a simple row of 3 trebles in each space. For the bits where the corners of each square are joined I did a treble in the corner space, treble in the join and a treble in the next corner space. The corners were created by making 3 trebles, chain 2, 3 trebles into each corner space. This ensures that the blanket lies flat and doesn't become too ruffled.
The actual border I used is a shawl border. It's designed by Doris Chan and can be found as free download here. (You'll need a Ravelry account to download the pattern). I simply added the border part of the shawl adjusting as needed to fit the stitches in the blanket border.


Once the border was finished I blocked the blanket again. This really showed off the finished border nicely.

Finished blanket!
I hope you have understood my instructions! I've tried to make them as simple as possible so that beginners can have a go at the blanket. If you get stuck, don't understand....or spot a mistake!!!...please let me know and I'll try to help.
Til next time!
Mx


Oh yes, such clear instructions. Another wonderfully snugly blanket to add to your collection!
ReplyDeleteA/x
Prachtiggg, en wat een mooie kleurencombinatie
ReplyDeleteBeautiful blanket - how many squares did you use please?
ReplyDeleteRos Brooks-Dagless
how many squares do you need???
ReplyDelete