


My mind immediately started whirring and working out how I could translate this stunning piece of work into a crochet project. The simplest way, I thought, was to opt for a closed granny square. Sooooo.....if you're new to crochet and have mastered trebles and chains you can make this! It really is that easy :-)
So go grab a drink, settle yourself comfortably and let's get started!
For my blanket I used Cotton 8 from Scheepjeswol. It's 100% cotton and sport weight so not heavy at all. Always important when making a blanket! Plus it can thrown in the washing machine when needed.
Ingredients

You will need:
Crochet hook - I used a size 4mm hook not 3.5mm as stated in my previous post (sorry!)
Scissors
Yarn as detailed below:
Red - 510 (50g)
Burnt Orange - 671 (50g)
Orange - 716 (50g)
Yellow - 714 (50g)
Light Green - 642 (50g)
Bright Green - 517 (50g)
Light Blue - 622 (50g)
Dark Blue - 563 (50g)
Purple - 661 (50g)
White - 502 (450g)
Black - 515 (100g)
The quantities I've stated will be more than enough to make the blanket and you'll have some spare left over! I've written the pattern in English crochet terms.

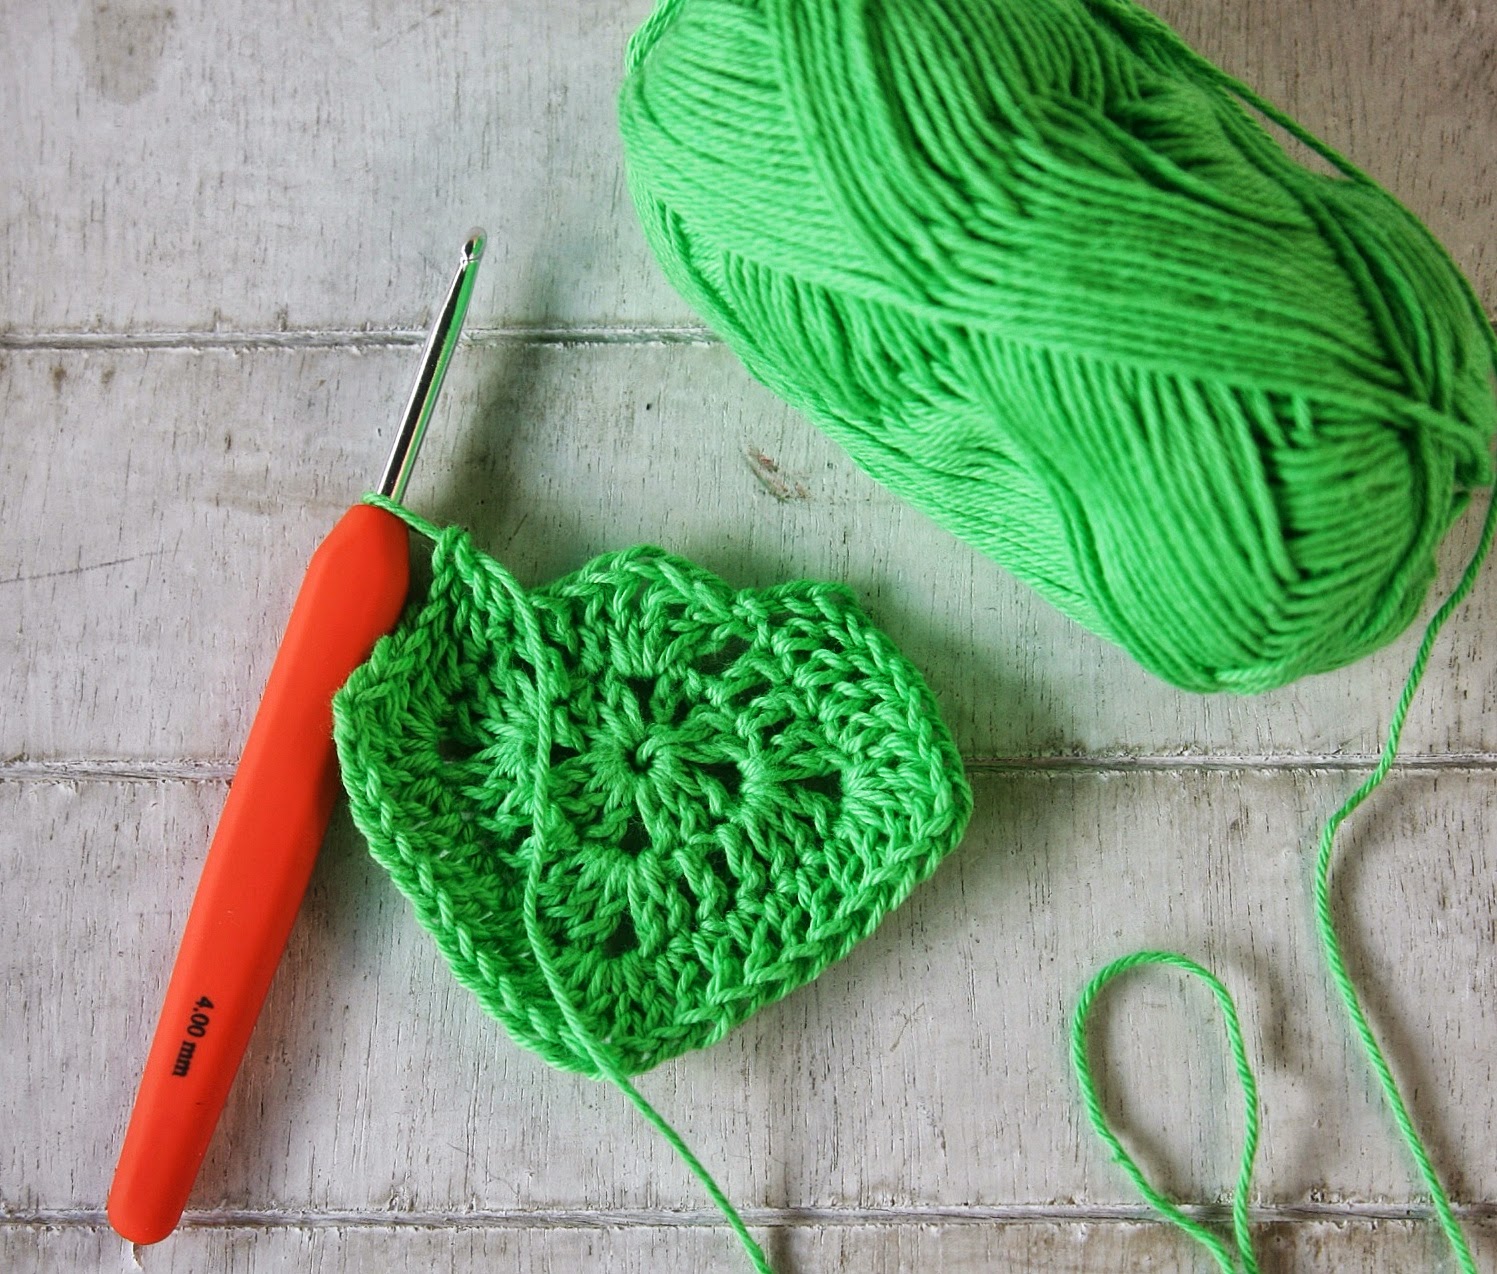
To start chain 4 and join with a slip stitch in the 4th chain from hook. Alternatively you can make a magic circle.

Round 1. Chain 3 (counts as first treble), 2 trebles into the circle you've formed with the chain, chain 1, 3 trebles into circle, chain 1, 3 trebles, chain 1, 3 trebles and finish with another chin 1. Join into the 3rd chain of the first stitch. You should end up with a teeny square as above.

Round 2. Chain 3 (counts as first treble). Into the top of the treble stitches rather than the spaces, treble into next 2 stitches. To make the corner (same on each round) into the chain space created in the last round treble 2, chain 1, treble 2. Treble into the next 3 stitches. Make a corner and repeat until you have reached the first stitch. Slip stitch into the third chain to join. This is the pattern. Easy huh? Basically each round is being increased by the corner stitches.
So on the third round you will have 7 trebles on the straight edge and 4 in each corner chain space. On the fourth round 11 trebles, the fifth is 15 trebles and the sixth you will have 19 trebles on the straight edge. There are always 4 trebles in each corner space. If you remember that each straight edge will increase by 4 trebles on each round you will to able to keep check on your stitch count.

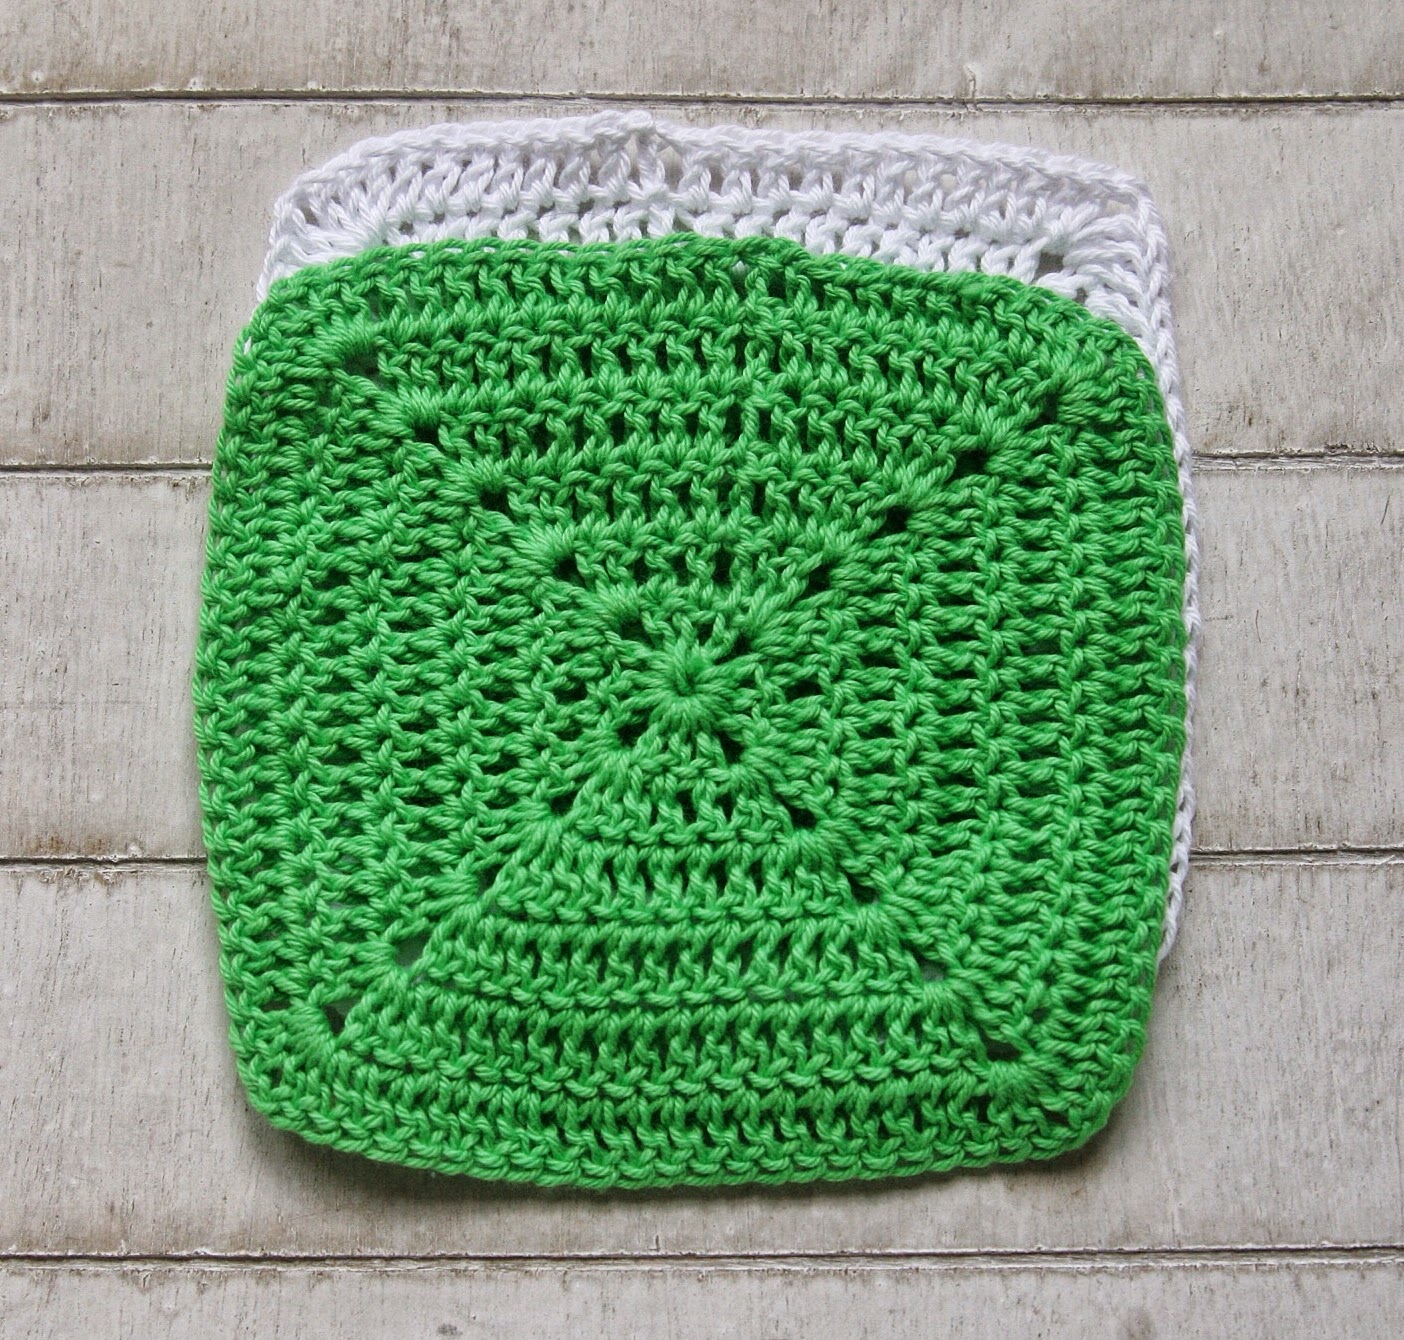
Each finished block is made up of 6 rounds. The pattern on the blanket is simply made by changing colour! Your finished block should look something like this.
For each row you will make:
2 blocks with 2 rounds of coloured yarn and 4 rounds of white
2 blocks with 4 rounds of coloured yarn and 2 rounds of white
1 block with 6 rounds of coloured yarn
2 blocks with 6 rounds of white
The placement is the same as the photo of the quilt.

For this tutorial I've just made up 3 blocks to show you how to join them. Please note, these squares have not been blocked! (lazy me!!!)
A little word on blocking! Whilst this yarn is a delight to work with, it improves enormously by blocking. The feel and drape is completely changed after a good old block. I tend to block as I go.

Once your squares have been blocked, you're now ready to join. It's really nice and easy!
Place the right sides together.

Now simply double crochet into each opposite stitch, securing in the corner chain space.

The back will look something like this.

And this is the front. It lies nice and flat. Tie in your tails and now it's time to make that funky border!!!
I really wanted to replicate the vertical stripes of the quilt, but didn't know how. Cue a google search and I found a gem of a tutorial on good old YouTube!
There are instructions for both Right Handed Hookers and also one for those of us who are Left Handed.
It's to make a checker board effect (drafts for English folk!!!) but we are only going to make the stripes. I did 4 trebles in each of the black and white. I had to fudge it a little for the corners, so some stripes are only 3 stitches wide but you can't really tell ;-)

My border is 4 rows deep. For the start of the corners I made sure that I started in either black or white in the chain space, 2 trebles - chain 1 - 2 trebles. The same as the blocks. Follow the pattern on for each row.

You can see the corners more clearly in this photo.
And that's it!!!

I hope my instructions are nice and clear for you. If you have any questions, pop them in the comments box and I shall try and answer them :-)
Fancy making this blanket???? Well check back on Wednesday as I have a Cotton 8 kit to give away to one lucky reader :-)
Before I go..... have you seen this????

How exciting???? Check out the Scheepjeswol Facebook Page tomorrow for more information!
I don't know about you, but I'm swooning at those colours!!!
Til Wednesday ;-)


This turned out totally stunning Maria and I really love your choice of yarn and colours.Looks like you had fun making it too...but then working with Scheepjeswol is a pleasure for sure.
ReplyDeleteHugs, Heike xx
It's beautiful! :)
ReplyDeleteThat border makes the whole piece just *ping*, love it!
ReplyDeleteA/x
Beautiful blanket! Did you join the Scheepjeswol CAL? I fell in love with the colors and ordered the package.
ReplyDeleteHi ;) just wondering how big this blanket is so I can do some maths, thank you :)
ReplyDeleteNo quite clear with the borders. Wonder how the 2 colours can stick together.
ReplyDeleteHi Shirley! If you watch the you tube tutorial all is revealed :-) the neighbouring colour is carried forward while you work so that they join together. Pretty nifty! x
DeleteDid you use UK crochet terms or US ones for this beautiful blanket ? Treble : the yarn wrapped once or twice around the hook ? [= "bride" or "double-bride" in French which is not exactly the same !]
ReplyDeleteThank you :-)
Annie
Hi Annie!
ReplyDeleteSorry I should have said, I use UK terms in all my patterns so just the once around the hook :-)
Maria x
Thanks a lot ! I'm enjoying beginning it as soon as I receive the white yarn (expected in a few days) :-)
ReplyDeleteAnnie
It's gorgeous!!!!!
ReplyDeleteI'm a print out the directions and have them at my finger tips when learning a new pattern kinda girl. Do you happen have a printable version? Also, it's absolutely beautiful and is going to make an amazing Christmas gift!
ReplyDeleteThank you!
Rana