Check out my cushion posts!
Showing posts with label cushion. Show all posts

23 Sept 2020

Making Archie

Hello!

Today it's all about Archie and how to make this cutie.
I'll take you through the making step by step and also give you some ideas on different colour combinations and expressions!


YOU WILL NEED:

 A Main colour: Scheepjes Cotton 8 White (502) x 2 balls 
B Scheepjes Cotton 8 Light Pastel Green (664) x 1 ball 
C Scheepjes Cotton 8 Soft Pink (654) x 1 ball
Black yarn for face (I used some Cotton 8 in Black (515) as I have an impressive stash of this yarn!!!)

3.0mm crochet hook
Tapestry needle for joining and sewing facial expressions
12x12" cushion pad
2 buttons for eyes (make Archie with sewn eyes if you are giving to small child as buttons are a choke hazard and we don't want any choking incidents!)
Blocking materials
Scissors

HOW TO

The body of the cushion is made with star stitch. It's a stitch that give a lovely texture and gives beautiful texture. The star stitch is worked over 2 rows. 

Bella Coco has a really lovely video explaining how to work this stitch and it can be found HERE

Make 2 pieces for front and back.

Using main colour A and 3mm hook, chain 77

Row 1 (RS): Insert hook into 2nd chain from hook, yarn over and pull up loop (2 loops on hook), insert hook into next chain, yarn over and pull up loop (3 loops on hook). Continue until you have 6 loops on hook, yarn over and pull through all 6 loops. Chain 1 to create the 'eye' of the star stitch. To make the next star, insert your hook into the eye, yarn over and pull up loop (2 loops on hook), insert hook between the last 2 spokes of the previous star you've just made, yarn over and pull up loop (3 loops on hook), insert hook into the same chain where you've worked the last spoke of the star stitch, yarn over and pull up loop (4 loops on hook), work into the next 2 chains in the same way and you will now have 6 loops on your hook. Yarn over and pull through all 6 loops. Continue working stitches until you reach the last stitch. Work one half treble in the last stitch. Turn work.
Row 2 (WS): Chain 2 (counts as first half treble), now work 2 half treble crochets into each eye of the star stitches of the previous row. Work 2 half trebles into the last stitch.

The following star stitch works are worked in almost the same way as row 1 except you'll begin each row with a chain 3 and start working into the 2nd chain from hook. 

Continue working star stitch until you have worked 44 rows. 
Join in colour B (do not cut colour A) and work a further 5 star stitch stripes alternating between colour A and B, carrying the yarn up the side of your work.

Fasten off, weave in ends and wet block to 12" x 12"

To make the ears:


Make 2
inc = work 2 double crochets in the same stitch

Using colour C, make a magic ring and work 6 double crochets into the circle. Pull the circle tight. Turn.
Row 1: Chain 1 (counts as dc), inc, dc, inc , dc, inc (9 stitches) turn
Row 2: Chain 1, inc, 2 dc, inc, 2 dc, inc,  dc (12 stitches) turn
Row 3: Chain 1, inc, 3 dc, inc, 3dc, inc, 2 dc (15 stitches) turn
Row 4: Chain 1, inc, 4 dc, inc, 4 dc. inc, 3dc (18 stitches) turn 
Row 5: Chain 1, inc, 5 dc, inc, 5dc, inc, 4 dc (21 stitches) turn
Row 6: Chain 1, inc, 6dc, inc, 6dc, inc, 5 dc (24 stitches) turn
Row 7: Chain 1, inc, 7 dc, inc, 7 dc, inc, 6 dc (27 stitches) turn
Row 8: Chain 1, inc, 8 dc, inc, 8 dc, inc, 7 dc (30 stitches) turn
Break colour C, join colour A
Row 9: Chain 1, inc, 9 dc, inc, 9 dc, inc, 8 dc (33 stitches) turn
Row 10: Chain 1, inc, 10dc, inc, 10dc, inc, 9 dc (36 stitches) turn
Row 11: Chain 1, inc, 11 dc, inc, 11 dc, inc, 10 dc (39 stitches) turn
Row 12: Chain 1, inc, 12 dc, inc, 12 dc, inc, 11 dc (42 stitches). Fasten off and weave in ends. 

THE FACE!

This is where you can have some fun!
It is really amazing how slightly altering an eye can change the whole expression of a face!

I embroidered Archies nose and mouth using back stitch and satin stitch for his nose. I just lightly used a pencil to sketch out the face but you could use any kind of disappearing pen (the kind used in embroidery)
His eyes on my version are buttons and eyebrows are a simple straight stitch. 

Add the face before you join the pieces together - so much easier than trying to wrestle with a cushion!!

Below are some simple faces showing how slightly altering lines can change the face. 


To join together, blanket stitch the front and back around 3 sides together using yarn A leaving the bottom edge open so you can insert the cushion pad. 
Next attach the ears with an over stitch, positioning the ears at a slight angle. 
Insert your cushion pad and blanket stitch the bottom opening. 

TAaaaDAaaaa!!!! 
Your cushion/Archie Bear is finished. 


Why not make a brown bear with a navy and white striped jumper?
He could be Archies French cousin Pierre!!!!!

Have fun, I hope you enjoy making Archie and pals!

Til next time when I have some new yarn to share.... x

16 Sept 2020

Meet Archie.......

I think he's a bit cute...


Made from Scheepjes Cotton 8 100% cotton yarn, he's a quick and affordable make.
Perfect for a "Welcome Baby" gift.... or a "just because" present. 

Hook him up with different colours and you've got a Teddy that any child would love. 


I had really good fun making him.
Playing with expressions.... it's amazing how slightly altering an eyebrow gives a completely different look. But more on that next week when I'll share how to make this cutie! Promise it's not too tricky!


Join me next time for some Archie making goodness!

Til then x

2 Aug 2019

Dotti Cushion - FREE Pattern and Tutorial!

Good evening!
Let's make a cushion!!!
Dotti is a cushion made from motif that's a circle within a square. It's all joined together using a join as you go technique. It looks complicated and tricky...but it's not. I've put together some step by step photos for you to follow. There are no complicated stitches used....just basic ones. I think an adventurous beginner could quite easily manage to make Dotti. 
The yarn I've used is Scheepjes Metropolis. It's a fingering weight yarn that comes in a lovely array of colours so you can have fun choosing a colour palette to suit. The yarn is a super snuggly 75% extra fine merino with 25% nylon to give some added strength. It's machine washable at 40°c. On each 50g ball you get 200m of yarny goodness! This yarn is seriously scrumptious!!!! I love that it smells like wool too..... I'm a yarn sniffer! 
Ok let's get on with it!
Ingredients
You will need:
Yarn A Scheepjes Metropolis 078 Lyon x 2 balls
Yarn B Scheepjes Metropolis 069 Miami x 2 balls
Yarn C Scheepjes Metropolis 019 Marseille x 1 ball 
Yarn D Scheepjes Metropolis 076 Sevilla x 1 ball
Yarn E Scheepjes Metropolis 018 Suwon x 1 ball
18" Cushion Pad
3mm Crochet Hook
Scissors
Needle for weaving in ends
Blocking materials
How to:
The pattern is written in UK English terms.
Using Yarn B chain 4 and join with a slip stitch to form a ring
Round 1. Chain 3 (counts as first treble crochet) and then work 11 more treble crochets into the ring. Join with a slip stitch in the 3rd chain. (12 treble crochets)
Round 2. Chain 3 (counts as first treble) and work a treble crochet into the first stitch. Work 2 treble crochets into the next stitch and repeat a further 10 times. Join with a slip stitch in the 3rd chain and fasten off. (24 treble crochets)
Now make a heap of 2 round circles!!!
You will need 162 in total. Don't faint! They're very quick to make and great for doing whilst watching telly 😊
In my version of Dotti I made 134 in Yarn B, 9 in Yarn C, 10 in yarn D and 9 in yarn E.
I added them randomly when joining. If you prefer, you could lay them all out and take a snap to refer back to. 

Join in Yarn A in any stitch of the circle.
Round 3. Chain 1 and work a double crochet into the same stitch. Double crochet in the next stitch. Half treble crochet and treble crochet in the next stitch. Chain 2 (to form the corner) and treble crochet and half treble crochet into the next stitch, double crochet into the next 2 stitches and chain 1. Repeat 3 more times around the circle and join with a slip in the first stitch. Fasten off and weave in ends. 

YOU WILL ONLY WORK A FULL 3RD ROUND FOR THIS FIRST SQUARE. 


This is where we will start to join as we go!

With Yarn A join in any stitch and work as before, making a chain and a double crochet in the first stitch. Work a double crochet in the next stitch and then a chain. Work a half treble and a treble into the next stitch then chain 2 to make the corner. Work a treble and a half treble into the next stitch and then a double into the next 2 stitches. Make a chain (this is where we are going to make the first join!) and with the 2 motifs side by side slide your hook under the side chain space of the finished square, wrap the yarn around your hook and pull through both loops on your hook to join the squares. Work 2 doubles in the next 2 stitches then a half treble and a treble in the next one. Chain 1, slip your hook into the corner chains of the finished square and join as before, work another chain. Continue around the square in pattern and join with a slip stitch. Fasten off and weave in ends. 

As you can see from the photo we are leaving the bottom corners free. This is so we can join diagonally to make neat joins where all of the 4 corners meet!


Continue to join all of your squares in the first row as before. You will need to join 9 squares.


When we come to start a new row, we work as before, but now we are going starting making some diagonal joins as the picture shows.
NB Ignore the line at the top....that's there in error as we've already made that join!
Also, I'm left handed. You might be working in a different joining direction!
It's all good 😉
This next step is where you need to start concentrating on your joining points. It's easy to miss one out! You will also see that we are joining where we have previously made a corner join. This time we are joining the corners that aren't already joined. It's made in exactly the same way only this time we sliding our hook under the previous join and catching in the corners we need to join now. It's a bit fiddly to start with but you will soon get the hang of it! 

When all 4 corners are joined you get a nice neat finish!


Continue joining your squares in this manner. Each row has 9 squares and you will need to work 9 rows. 
I really advise weaving in your ends after you've joined each square. It doesn't take a minute and will save you the despair of having a gazillion ends to weave in before you block your pieces!!!

You need to make 2 pieces like this!

Now give them a block. 

NB! This is a superwashed yarn, and as such, it will grow when wet. It actually grows a fair bit! I gave mine a nice soak in some Eucalan, gently squeezed out the excess water and then placed the squares in towels which I rolled up to get rid of as much moisture as possible. I then placed them on my blocking mats and measured 18" square and shaped them to that size. This yarn really changes texture when blocked. It becomes even more soft if that's possible!

To join your squares place the 2 cushion pieces together with wrong sides touching and using Yarn B join together by working a double crochet into each stitch. At the corners I worked 3 double crochets into the corner chain spaces. 

Now I'm a bit of a lazy mare and can't be bothered (most of the time) to add buttons etc to make openings. I just joined 3 sides, popped the cushion pad in and crocheted the final side together! 

It would be very easy to add in a neat opening. Just work the double crochet along one side, not joining, and on the other side join in either yarn A or B and work a few rows of double crochet so you have enough to sew your buttons on... line them up with motif joins to give you ready made button holes!

Ok I hope that was useful for you all 😁
If you get stuck just drop me an email....I try to answer them as quick as I can!

I'll leave you with some more Dotti photos.


I look forward to seeing your Dotti creations!
Til next time x

25 Jul 2019

Introducing Dotti

Evening!
Sorry for the delay in getting this introduction to you all....life has been a little crazy of late and I've struggled to keep the plates a spinning!
Last time I showed you progress on my latest project.
A cushion made using the gorgeous new yarn by Scheepjes
Metropolis is a fingering weight merino/nylon blend that comes in a mind boggling array of colours. 
A 50g ball has 200m and it is machine washable. 


If you remember back, I chose these colours to make my cushion with. 
I love that they a bit of a retro vibe going on!

I decided to make a cushion as these colours work perfectly with the decor in my living room and knew it would work well on my reading chair!

The pattern is join as you go (jaygo) and is very simple. Perfect for an adventurous beginner and it can easily be adapted to any size cushion. 


And here we have it! The finished cushion!
I've called it Dotti. 


As per usual there will be a free pattern for Dotti 😊


I'm really pleased with how it turned out....and I love the photos I took of it at Hume Castle. 

I shall try and get the pattern published by the end of next week....fingers crossed everything stays calm and quiet!!!!

Til then x
post signature

9 Jun 2019

In progress.....

Evening!
Ok this progress post is a little later than planned, but late than never eh?
I was finishing up a rather tricky commission that took waaayyyyy longer than anticipated so it kind of threw my schedule off by a couple of weeks. That and a knitting addiction and also work being a bit nuts. However.... I think I'm getting back on track.
If you remember from the last post I had received some delicious new yarn to play with. 


Scheepjes Metropolis is a fairly new release. 75% Extra Fine Merino and 25% Nylon fingering weight. It's available in a mind blowing range of colours! 

When I ordered this yarn I knew I wanted to make a shawl/wrap type of thingy in these retro colours. In my mind I kind of knew how I wanted it to look. 

So I had a little play...and played some more....and some more....
You get the picture!
Try as I might, the geometric design that I had in my head did not want to become a shawl/wrap thingy.
It kept screaming "MAKE ME INTO A CUSHION THAT WOULD LOOK SIMPLY FABULOUS ON YOUR READING CHAIR!!!!"
Well who was I to argue with such a demand??!!!
So off I set, making heaps of tiny 2 round circles....
And before I knew it I had joined them up to make half a cushion cover...

I joined the circles with the cream yarn


Random (yes! completely random) pops of colour amongst the charcoal grey


Oh. My. Goodness.
I am in love with this. 
I love the colours playing together and the design and texture. 

Oh and a few words about the yarn. It's a joy! 
It's fairly lightly played which makes it super soft. 
It slips off the hook like butter and has beautiful stitch definition.
But the best thing? Oh without a doubt the best thing is the smell.
It smells of sheep!
Glorious woolly woolly sheep. 
Yes! A yarn from Scheepjes that smells of sheepies!!!!!
Pretty darn perfect if you ask me!

Ok next time we will have a finished object.
Promise!

Til then x
post signature

25 Nov 2017

Yoga Cushion Pattern

Hi Folks!
So today I'm sharing how to make the yoga cushion I revealed in the last post.


It's a simple stitch pattern that really makes the yarn sing!
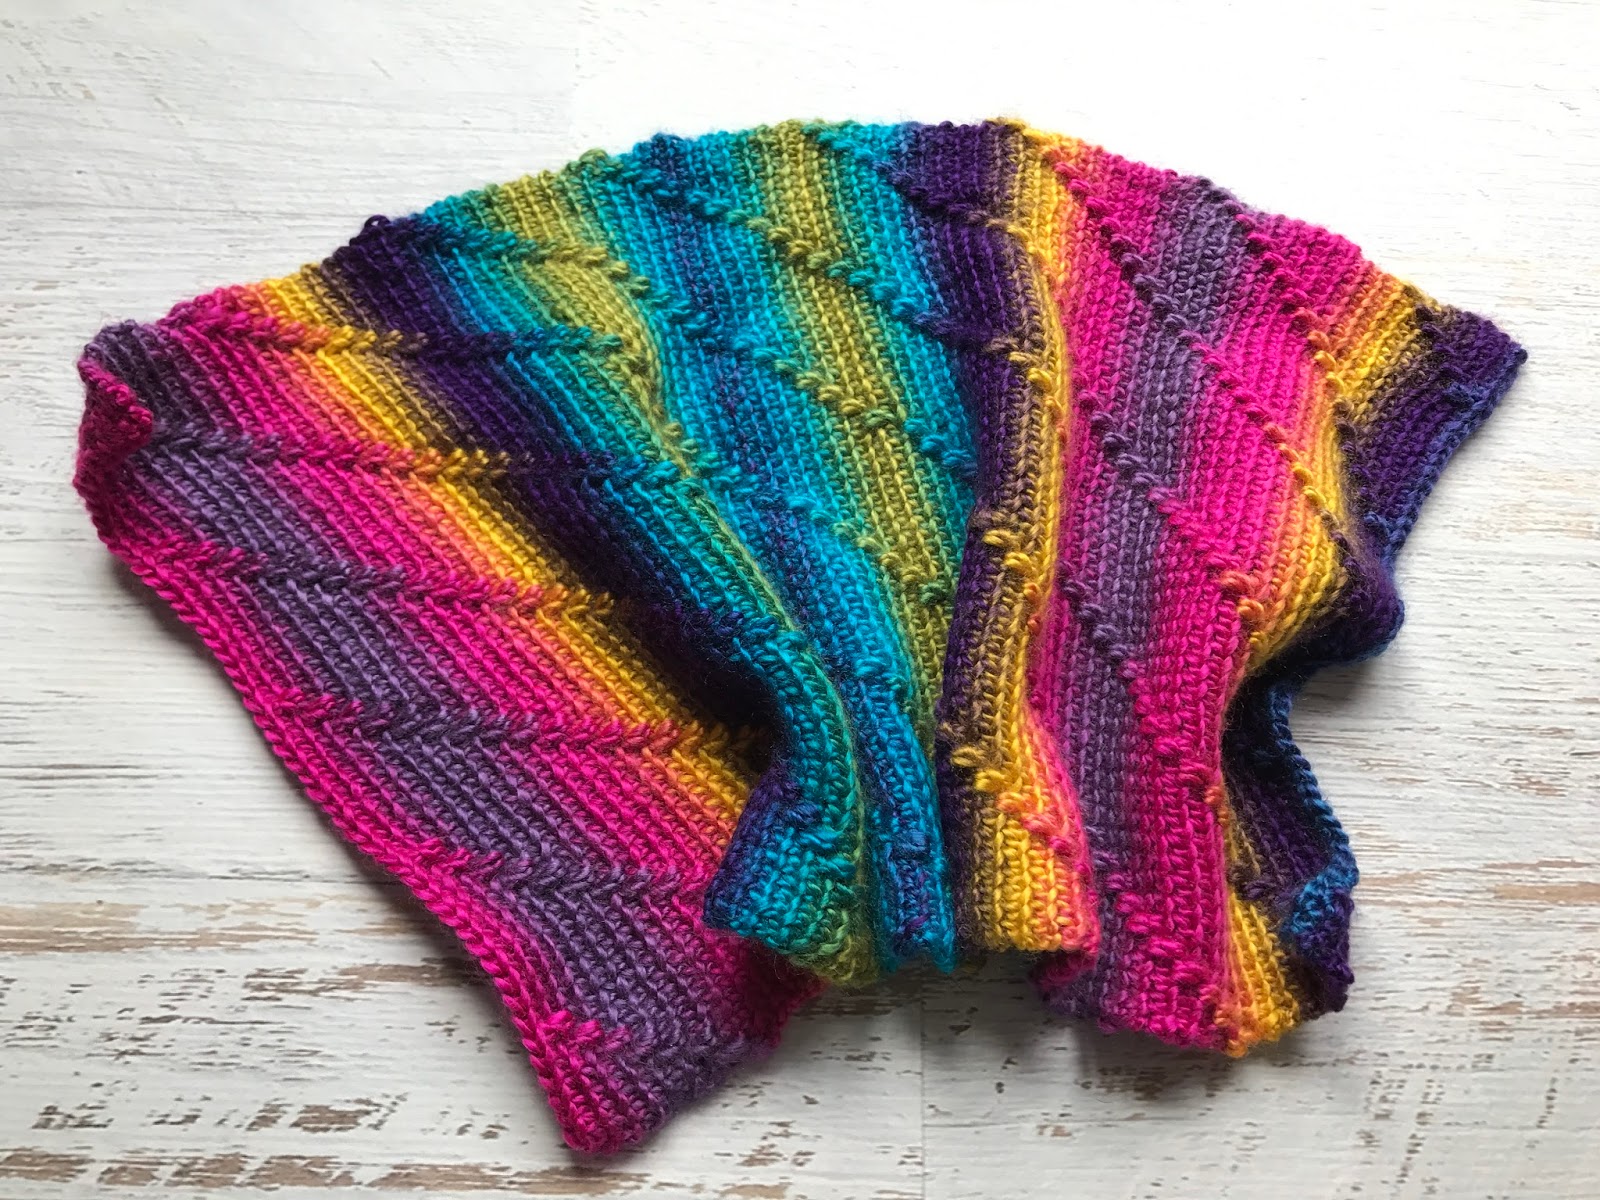
Scheepjes Wanderlust yarn is single spun 100% acrylic yarn with a fairly slow colour change that allows for an effect where the colours merge into each other to give a pleasing striped finish. The width of your project will determine how wide the stripes appear. So the wider your project, the narrower your stripes will be. 

The ball size is 100g and for that you get 232 metres of yarn. It retails at around £3.99 per ball and is machine washable at 30 degrees.

It comes in a lovely range of colours...


For my Wanderlust journey I opted for the Hawaii colour way.....because I loved the colour palette and it also matched my yoga accessories nicely! 


When deciding on a stitch for this cushion I wanted one that not only showed the yarn to it's best but also had some texture. I made a fair few swatches with different stitches before I decided on this one. 

I loved the look of Apache Tears by Sarah London.....but wanted something a little less fussy. Then I stumbled upon a blanket made by Wink. I swatched to see how it would work without changing colour each row and it worked beautifully 😍 
Wink has produced a fabulous step by step guide to make this stitch so I'm not going to reinvent the wheel by posting another guide here today.....you find her instructions HERE. That link is for the English version. 
The Dutch version can be found HERE.

Ok on to the cushion instructions.....

Ingredients!
Scheepjes Wanderlust x 2 100g balls (if you are making a larger/different shaped cushion you may require more yarn)
4mm crochet hook
Scissors
Needle to weave in ends (sorry! there are a lot of ends!)
Cushion pad 12" x 20" (I got mine HERE)

How To!
Make 2 oblongs following the pattern instructions from the links above. 
You will chain 50 + 1 to give the required width for the cushion. If you are making a different sized cushion you will have to adjust the starting chain to fit. 
The pattern calls for multiples of 10 plus 1 for turning on the first row only. 
At the end of each worked row following this you will fasten off, turn your work and rejoin the yarn. Whilst you are working this pattern, the right side of the work will always be visible. 
You will end up with lots of ends to weave in! If you are like me and find this a tedious chore, I would suggest working around 10 rows and then stop and weave in those pesky ends!


I'm sure they breed!!!!

Continue until you have worked 84 rows. Fasten off. 
Now make the other cushion piece exactly the same. 
As the 2 cushions pieces are being stretched over a cushion pad I didn't block them.

To join, place the 2 oblongs wrong sides together. I used a simple double crochet join. I joined a short edge, then a long edge, then a short edge. I then squeezed the cushion pad in place and used some plastic safety pins/stitch markers a bit like this....


......to evenly pin the remaining sides together. It just makes it a bit easier and ensures that the sides are evenly joined. It can be a bit fiddly! Fasten off and weave in (MORE) ends!

I finished off my cushion with some tassels added to each corner. You can find instructions on tassel making HERE!
You now have a finished cushion!


I hope you like it 😊

Next time I'll show you the yarn I've chosen for my next project and share the inspiration behind the colour choices. 

Til then x

post signature

18 Nov 2017

One Finished Yoga Cushion!

Good evening!
As promised, today I'm showing you my finished yoga cushion.
In all honesty, this cushion was completed a little while ago and has been in use since!
It works perfectly....just enough height for me to perch comfortably 😉

I opted for a fairly well stuffed feather cushion pad so it would stand the test of time....in other words it would stand the weight of me on it without becoming as flat as a pancake!

So here we go....


I used Scheepjes Wanderlust in the Hawaii colour way.


The cushion used only 2 balls of yarn which makes it a very affordable project as it retails at £3.99 per 100g ball.


I added a tassel to each corner to give a bit of interest....well that and I seem to have a tassel thing going on at the minute 😉


The colours work beautifully with my well worn yoga mat!


I'll be showing you how you can make the cushion (or similar) in the next couple of days.
It's a simple but effective stitch pattern and you can alter it to fit whatever cushion size you need 😊
On that note I'm off to pour a well deserved gin and tonic... (it's been a busy day here!)

Til next time x

post signature

10 Nov 2017

New Project Update

Hi Folks!
Long time no speak.....this year literally has been a whirl of activity.
It seems like ages since since I last posted so thought it was about time I put down the hook long enough to write a quick update on this project.

If you remember (I know! it's been a long time...!) I had started a new project with some gorgeous Wanderlust yarn from Scheepjes.


A lovely 100% acrylic colour changing yarn to make a yoga cushion.


Bet you didn't expect all of those colours hidden inside that ball of yarn?
I chose the Hawaii colour way for this project because I loved the variety of colours and also it works perfectly with my yoga mats (plural....I have 2!)


The texture of this crochet stitch really brings this yarn to life...
I've made 2 rectangles to join together to cover the cushion. As it's going to be stretched over a cushion pad there was no need to block!


Check out that yummy texture!
The only drawback with this stitch pattern is that you have to fasten off and join on every row.
Yup....that means a whole heap of little tails to weave in....


Next project will definitely not require this level of tail weaving in!
It really was worth it though....I'm delighted with the finished cushion 😍😍😍

Join me next week and I'll reveal all!
Til then x


post signature
TEMPLATE DESIGNED BY PRETTYWILDTHINGS